
In this article we attempt to upgrade the ESP32 Web Server that we developed in our previous article.
The upgrade concerns two functions of the station. The first has to do with the power supply of the device and the second with the process by which the station connects to the wifi network we want.
In the images below we see the ESP32 Web Server (Weather Station) as well as its interior after the upgrade.
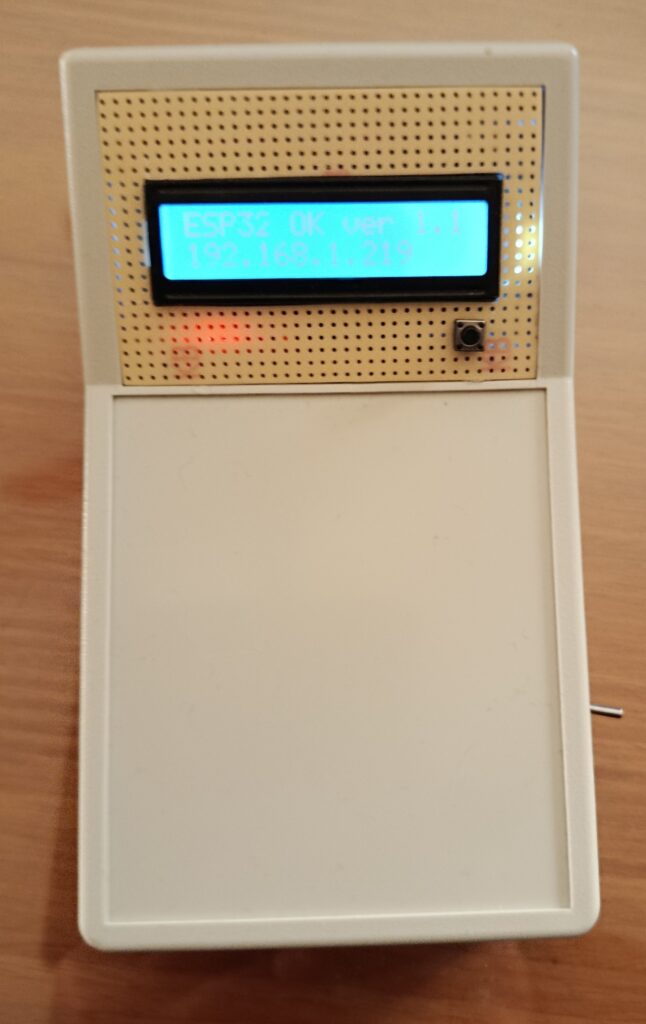
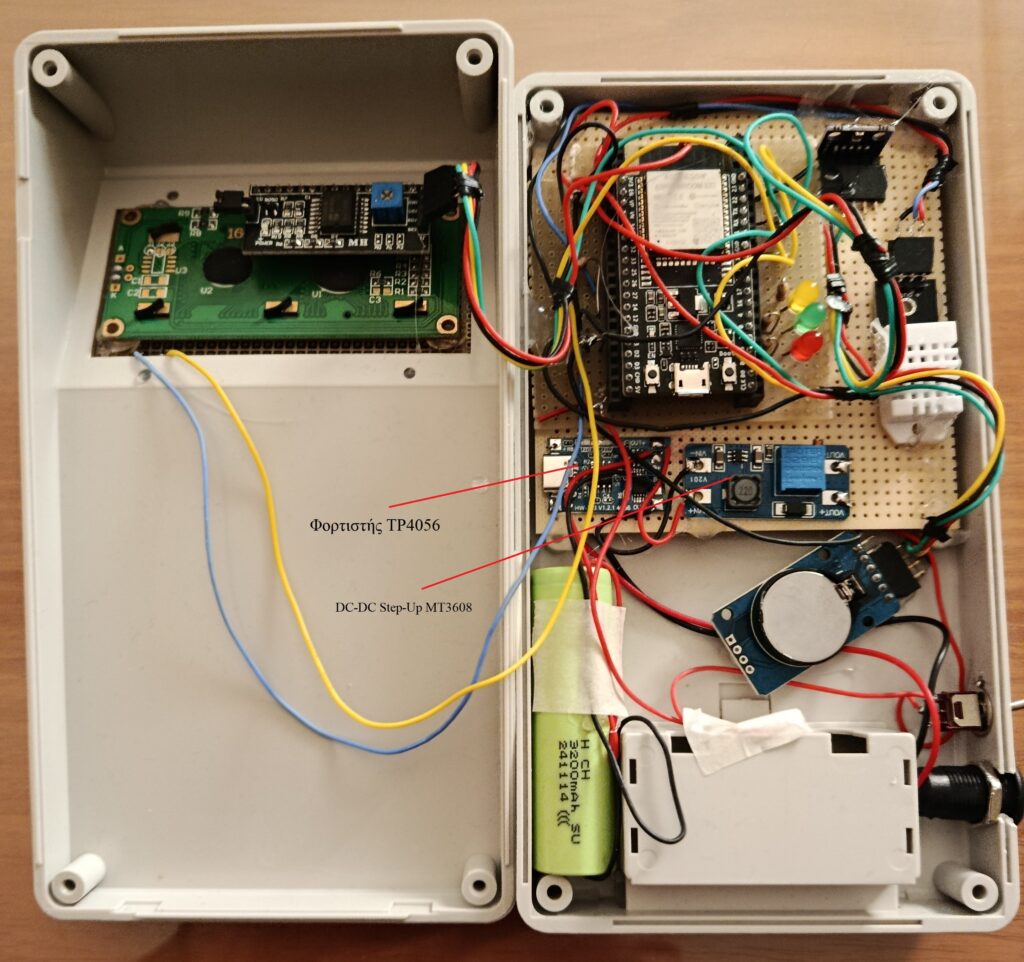
Looking at the interior of the station we can see the battery that we have added, the connection to the usb-c socket for charging the battery, the TP4056 charger, the DC-DC Step-Up Converter MT3608 for powering the circuit and the On-Off switch that turns the device on.
A. Power supply.
By adding the power supply circuit, we ensure the autonomous operation of the station for more than 24 hours. We add to the construction a rechargeable 18650 Lithium 3000mAh battery, a charging circuit and a battery power supply circuit.
The materials needed for construction are:
- 18650 Li-ion 3000mAh battery
- A lithium battery charger TP4056
- A DC-DC Step-Up Converter 5-28V 1.5A MT3608
- An On-Off switch
- A USB C connector for connecting to a mobile phone charger
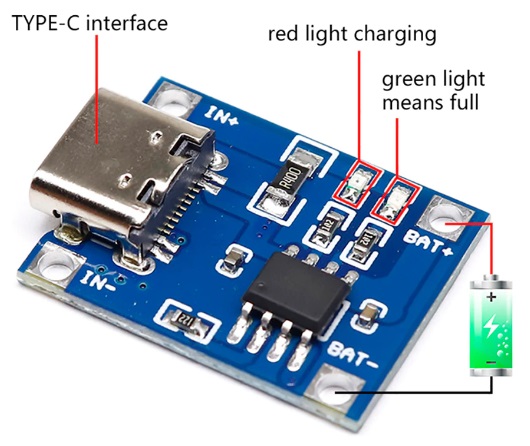
In the figure below we see the TP4056 lithium battery charger that we used.
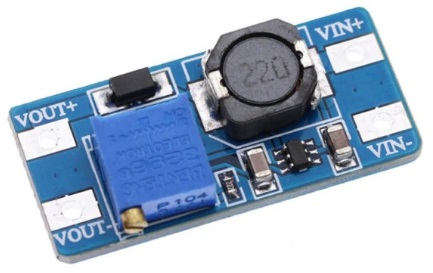
Here we also see the MT3608 DC-DC Step-Up Converter that gives us the voltage of 5v. Caution, set the MT3608 DC-DC Step-Up Converter to have output 5v before connecting it to the ESP32.
The schematic diagram of the connection of the materials is shown below
  USB-c
    |
  TP4056
 B+    B-
 |     |
 Li-Ion 3.7V
    |
 Step-Up 5V
    |
 ESP32 5V pin
Great care is needed at the output of the Step-Up, set it to give a 5v output before connecting it to the ESP32. The connection is made to the 5v pin of the ESP32.
B. Connecting to a wifi network
To develop the Weather Station application, we used Microsoft’s Visual Studio Code (VS code) development tool. Here you will find the complete main.cpp file of the application.
In this upgrade, we use the ability of the ESP32 to create a wifi network in two ways,
a. Access Point (AP) where it functions as a Wi-Fi hotspot (router) and
b. Station Mode (STA) where it functions as a client.
This upgrade is done by modifying the application setup. If the ESP32 does not recognize a wifi network during setup to connect to, it will create an Access Point with a default address of 192.168.4.1 and will request information about the wifi network. That is, it will detect the existing networks and wait for us to indicate one of them. It will then request an access password for this network and will automatically connect to the network we indicated.
In order for the computer or mobile phone browser to connect to the address 192.168.4.1, the ESP32 hotspot must have been previously selected from the computer / mobile wifi. In our application, the name we used for the hotspot is “ESP32_Setup” and the password we gave is “12345678”
You will find the function described above in detail in the relevant article “ESP32 WebServer with automatic Wi-Fi Setup”
This article will help you a lot to understand the upgrade we are making to the Weather Station software.