
Practical application
It’s time to see how a servomotor connects and works.
You will need some materials:
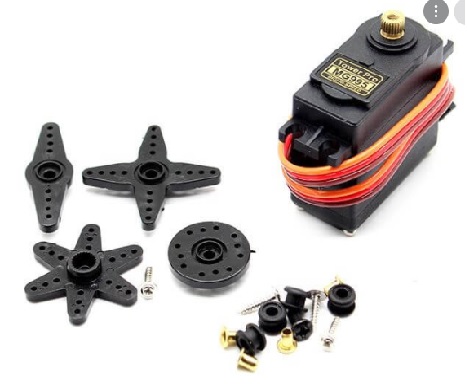
1. A servomotor e.g. MG995
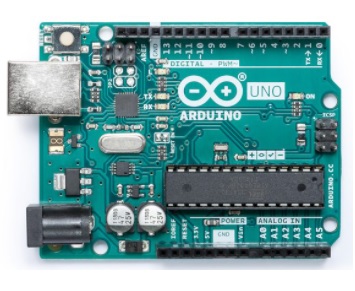
2. An Arduino UNO board or compatible
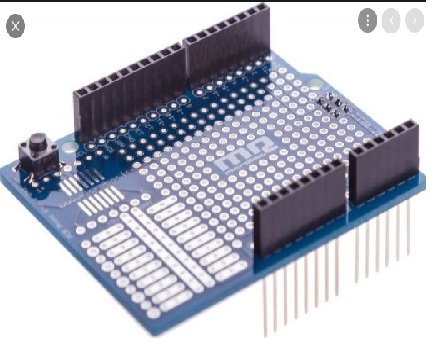
3. An empty Arduino UNO board on which the connections will be made and then fastened to the Arduino board.
4. A 5-7V DC power supply to power the servomotor.
5. A 10K potentiometer
You will also need some tools (soldering iron, etc.), a few meters of thin cable and a little construction experience.
To program and operate the system you must have the Ardouino IDE installed and have little experience with it. Both hardware and software are OPEN, see
https://en.wikipedia.org/wiki/Open_top_material
https://en.wikipedia.org/wiki/Open_Software
Construction
On the blank Arduino UNO board I make the connection circuit of the materials. An example of wiring can be seen at https://www.arduino.cc/en/Tutorial/Knob in which I have made the necessary modifications.
In the photo below you can see the construction is finished. Here I use two servomotors and two potentiometers, because the construction has future use. The servomotors are positioned so that the movements take place in two planes perpendicular to each other. We will use this detail in our next construction.
At the end of your article I have a video where you see the construction in operation.
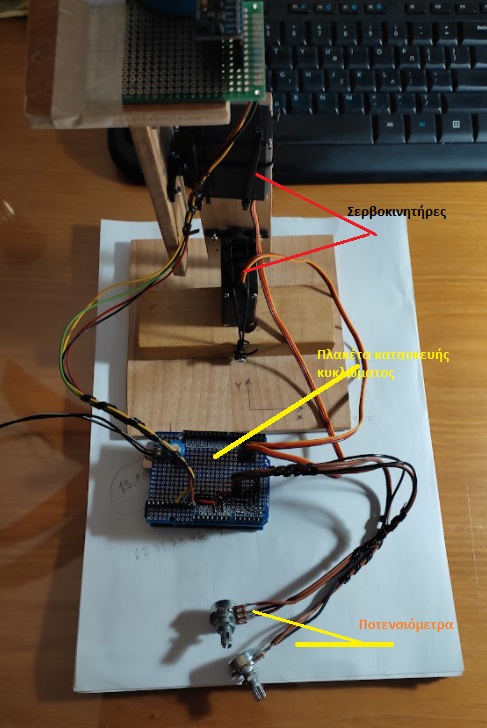
Each potentiometer has three pins. The two ends are connected to the GND ground and to the 5V respectively. Depending on the rotation position of the potentiometer, the medium will have a potential between 0 and 5V. The middle pin of the potentiometer is connected to the analog input A0 of the Arduino. The values that the program will read for input A0 will be between 0 and 1023.
The servomotive usually needs more power than this can be given by the power supply of the Arduino from a USB port. For this reason we use the additional power supply. The ground of this power supply will be connected to the Arduino GND. It will be good to connect a 1000μF capacitor between the ground and the positive of the power supply, which will ensure the high current requirement when starting the motor.
Servomotors have three cables: current, ground and signal. The power cord is usually red and should be plugged into the 5-7V of the power supply. The ground wire is usually black or brown and should be connected to a ground pin on the Arduino board. The signal pin is usually yellow, orange or white and should be connected to a digital pin on the Arduino board. In our construction it will be connected to the digital pin 4.
Programming
The program I present to you moves two servomotors using two potentiometers as shown in the video. The construction was done with two servomotors because it will be used in the next experiment.
Arduino UNO enables PWM signal generation on pins 3,5,6,9,10 and 11. We use the Servo.h library to simplify programming for PWM signal output, also in the way it handles the library producing PWM signal we can use all digital pins to generate PWM signal.
/*
έλεγχος της θέσης δύο σερβοκινητήρων με τη χρήση δύο μεταβλητών αντιστάσεων – ποτενσιομέτρων
Μανώλης Αριστοβουλίδης 10/2021
*/

#include <Servo.h>
Servo servo1; // δημιουργία ενός servo object για τον έλεγχο του servo
Servo servo2;

int potpin1 = A0; // αναλογικό pin για τη σύνδεση ποτενσιομέτρου
int potpin2 = A1; // αναλογικό pin για τη σύνδεση ποτενσιομέτρου
int val1; // μεταβλητή για την ανάγνωση της τιμής του αναλογικό pin
int val2; // μεταβλητή για την ανάγνωση της τιμής του αναλογικό pin

void setup() {
servo1.attach(4); // κάνει προσάρτηση του servo στο pin 4 του servo object
servo2.attach(5); //κάνει προσάρτηση του servo στο pin 5 του servo object
Serial.begin(9600); //αρχικοποιεί τη σειριακή επικοινωνία
}

void loop() {
val1 = analogRead(potpin1); // διαβάζει την αναλογική τιμή (τιμές μεταξύ 0 και 1023)
val2 = analogRead(potpin2); // διαβάζει την αναλογική τιμή (τιμές μεταξύ 0 και 1023)
val1 = map(val1, 0, 1023, 0, 180); // μεταροπή σε κλίμακα για το servo (τιμές μεταξύ 0 και 180)
val2 = map(val2, 0, 1023, 0, 180); // μεταροπή σε κλίμακα για το servo (τιμές μεταξύ 0 και 180)
servo1.write(val1); // ρυθμίζει τη θέση του servo στην τιμή της κλίμακας
servo2.write(val2); // ρυθμίζει τη θέση του servo στην τιμή της κλίμακας

Serial.print("val1 : ");
Serial.print(val1);
Serial.print(" - val2 : ");
Serial.println(val2);
delay(20); // περιμένει για την ολοκλήρωση της κίνησης του servo
}
The code can be downloaded here https://avlos.gr/wpress/download/servo
In the video that follows you can see the mechanism in operation https://youtu.be/BCxv9VGqhQk